Introduction
SSH Keys
To set up a connection between a Git client (without having to enter a
password each time) and the Bitbucket service, you need to generate keys
that will be involved in the SSH authentication process: a private key and a
public key.
Creating keys
Bitbucket supports four client key encryption algorithms: Ed25519, ECDSA, RSA and DSA. Select one of them with a recommended key length not less than the following values:
ssh-keygen -t ed25519 -b 256
ssh-keygen -t ecdsa -b 256
ssh-keygen -t rsa -b 2048
ssh-keygen -t dsa -b 1024
The final command should look similar to this:
ssh-keygen -t ed25519 -b 4096 -C {username@emaildomain.com} -f {ssh-key-name}
- {username@emaildomain.com} the email address associated with your Bitbucket account
- {ssh-key-name} is the name of the files that will be generated (this flag is not required)
If file names have not been provided, you will be asked for a name on the command line. However, you can press Enter and the pair of files (private and public keys) will receive the default name.

The files will be generated in the .ssh directory located in the user's home directory.
Key installation
Where to install?
The private key should not be shared with anyone and should be installed on the host (user's computer) from which the SSH connection is initiated. The public key should be installed on Bitbucket.
Private key installation
Execute the command to add the private key to the SSH agent:
ssh-add {ssh-key-name}
where {ssh-key-name} is the name of the private key generated earlier. If keys have already been generated before or you need to configure a new one, it is worth checking the settings in the .ssh/config file, which may contain an entry for the key location:
Host bitbucket.org
AddKeysToAgent yes
IdentityFile ~/.ssh/{ssh-key-name}
Public key installation
Install the public key on Bitbucket. Find the "gear" icon in the settings of a given repository and go to "Access keys".
Note: make sure your repository allows both read and write access using SSH keys. If only the read option is active, it will not be possible to make changes to the repository (e.g. git push).
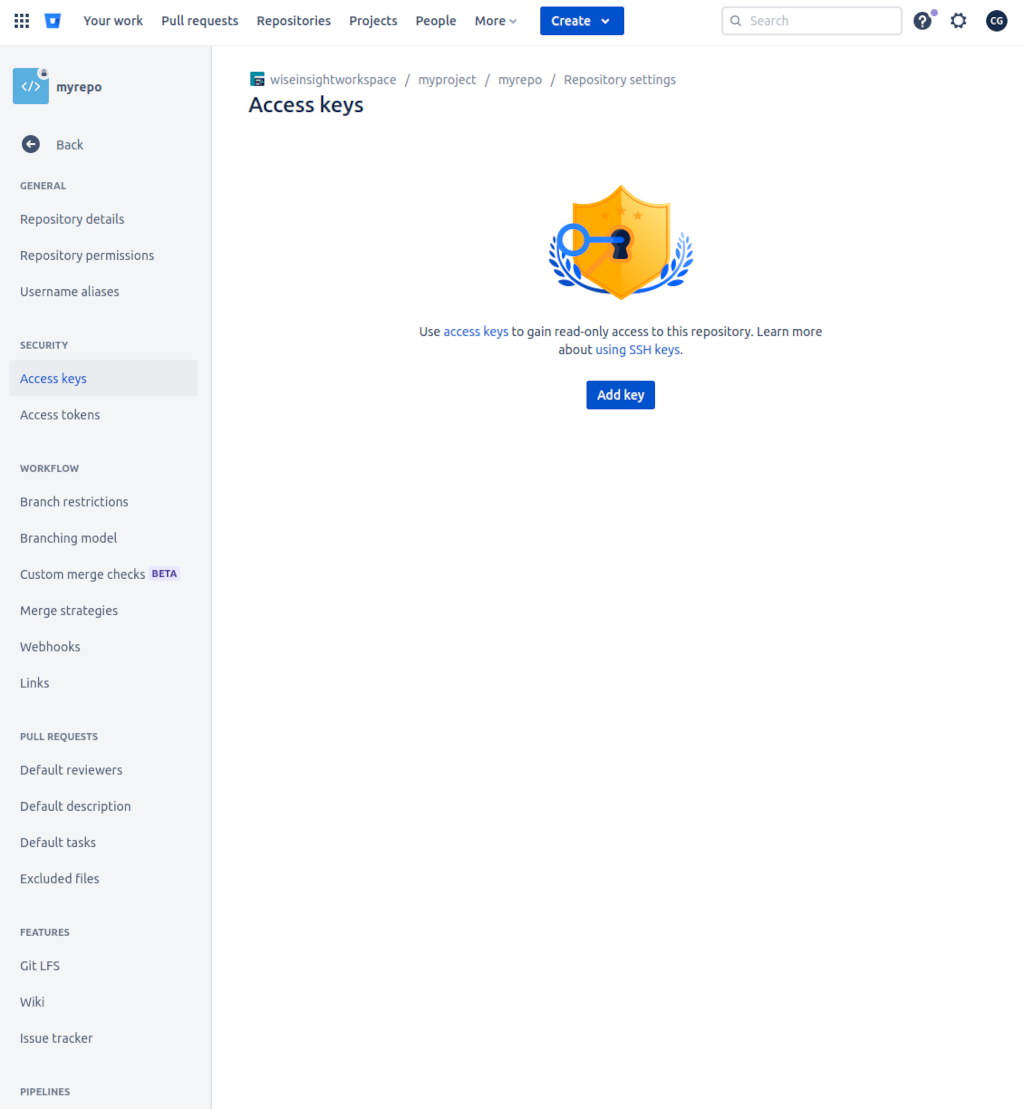
Then add the contents of the public key file and save the changes.
Testing
Execute the following command to ensure the installation was successful.
ssh -T git@bitbucket.org
You no longer need to provide your username. The authentication process when using GIT commands (e.g. git push, git pull...) should be performed using installed keys. You can now download your repository as follows:
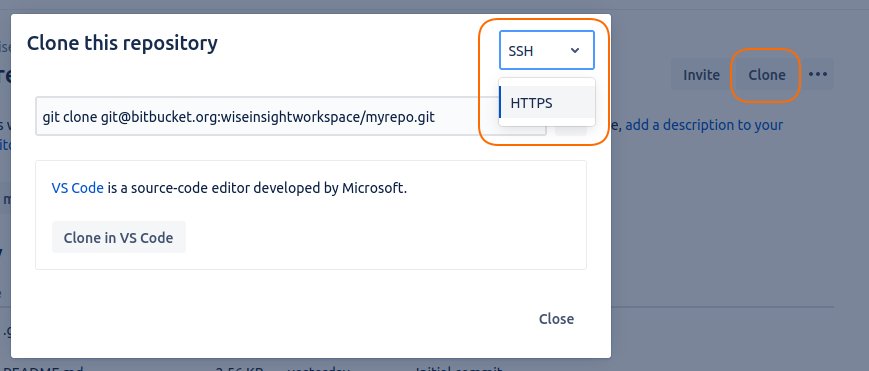
git clone git@bitbucket.org:myworkspace/myrepo.git
Remember to use an address intended for SSH connection, not HTTPS!
If you are connecting to the website for the first time, the above command may require additional confirmation, which will add a new entry to the known_hosts file.
You can manually add a new entry, one way is to execute the command:
ssh-keygen -R bitbucket.org && curl https://bitbucket.org/site/ssh >> ~/.ssh/known_hosts
Of course, make sure the known_hosts file exists, whether the command line has the curl command, and the name of the Bitbucket service you are using (your company may provide a Bitbucket under a different name and port).
It is equivalent to copying the content contained on the website https://bitbucket.org/site/ssh directly into the known_hosts.

Good luck!
 #buymeacoffee